Hi! I’m in San Diego right now! WOOT!
When I made a list of people to guest post, I had to include my husband. Because he’s good with words.
He’s also good with food.
Since I made this open topic, he decided to share with y’all his newest lover…err…obsession…uhh…talent. Yes. Talent.
Today? He will teach you all how to tap into your inner baker and make your own bread. Captions by me.
(I accept no responsibility if you lick your own computer screen and/or gain 10 pounds in carb-weight while reading. Enjoy.)
_________________________________________________________________________________
So it’s open mic night on the NSJM blog. And I bring you, once again… food.
And forgive me if I bore you here. I am a very technical writer and this will be a LONG blog post.
Warning: Go away, carb haters. You’re not wanted here. Not today, anyway. Just reading this post will make your body kick itself out of ketosis.
Bread. Such a simple and misunderstood food.
Typically, I’m a… uhh… typical guy when it comes to cooking. Grilling and smoking meat are definitely the first choice when it comes to feeding mass quantities of people. Or just me and Miranda, since Joshua is the world’s youngest vegetarian by choice. And I’m not a Tim “The Tool Man” Taylor har-har-HAR griller either. My knowledge spans things like the Maillard reaction, sous vide cooking, and the enzymatic breakdown of tissue caused by dry-aging beef in a temperature controlled environment.
Dangit. I love meat so much that I started going off on a tangent.
Anyway. I really take cooking very seriously. I just love it.
So one of the first really GOOD steaks I had ever had was at Ruth’s Chris Steak House. I know they’re a chain. But they’re a mighty fine chain that serves USDA Prime grade beef. Regardless, one of the more memorable things that they serve is their bread. French baguettes, served warm. Salted butter. That’s it. That really started my love affair with good bread.
A few years ago, I stumbled across the Jim Lahey/Mark Bittman No-Knead Bread recipe posted in the New York Times. This recipe turned the baking world on its collective head. Crusty, chewy, artisan white bread at home? Impossible! So I had always intended to make this bread, but never had the right tool for it – namely a 5+ quart Dutch oven.
Quit, get your head out of the gutter. Not THAT kind of Dutch oven!
The Le Creuset Dutch (or as they say, French) oven was, and still is, the pinnacle of cookware when it comes to this recipe. But at $240, it reaches into monthly car payment territory. Luckily, Lodge Cast Iron makes a wonderful porcelain enamel-coated, 6 quart, cast iron Dutch oven for a much better price of $60, available at your local Target.
And upon doing some more reading on the interwebs, I stumbled on Cook’s Illustrated doing an improvised version of the NYT no-knead recipe, but with a very small amount of kneading to “release” the gluten structure a bit more. And yet more research yielded the thinking of long, slow, cold dough fermentation in the fridge resulting in more developed flavor than letting it rise on the counter overnight.
So combine all of these techniques, and you get this blog post. This is easy, people. There are very few ingredients. There’s a bit of technique involved, but it’s nothing earth-shattering. And sorry for the iPhone 3G photos.
Dan’s Almost No-Knead Cold Rise Crusty Bread
Ingredients:
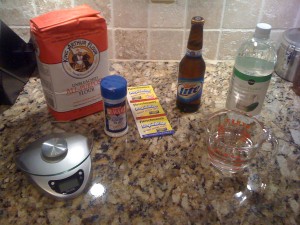
Oh look! Ingredients!
15 ounces of unbleached, white, all-purpose flour
7 ounces of water
3 ounces of beer (pilsner or lager is best)
1.5 tablespoons of table salt
1/4 teaspoon RapidRise or instant yeast
1 tablespoon of white vinegar
Specialty equipment needed: 5+ quart Dutch oven (not the camping style), gram scale, parchment paper.
Notice the measurements are in ounces. Breads are very finicky about the proper amount of flour and water. Hard-packed flour into a 1-cup scoop may weigh 6 ounces, loosely packed flour may weigh 4 ounces. Measuring by mass takes all the density out of the equation.
Whisk your dry ingredients together.
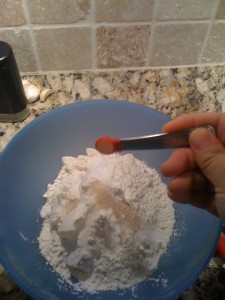
Editor's note: This is not whisking. Have you tried to take a picture while whisking?
Go ahead and dump in the beer…
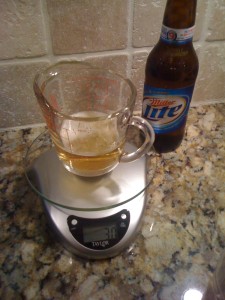
Bonus! Whatever beer you don't use in the bread you get to drink!
And the water (and the vinegar, not shown).
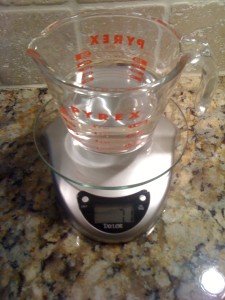
Measure (and weigh) twice. Pour once.
And mix it all together with a big spoon until a shaggy ball forms.
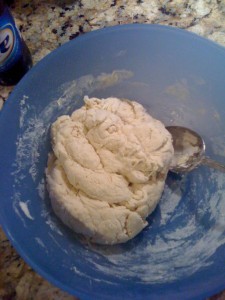
Shaggy ball. Snort.
Lightly spray a clean bowl with cooking spray and place the dough into the bowl. Cover with plastic wrap and put it in your fridge for at least 2 days. You can go up to 7 days.
And on the second day, you’ll have yeasties creating lots of gluten! The gluten development will make for nice, airy holes in the bread.
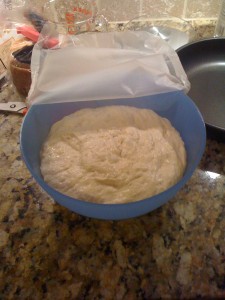
It is risen!
Now lightly flour a clean countertop or cutting board. Dump the dough and knead it gently, folding it over onto itself, for only about 15-20 seconds. It doesn’t take much. Shape it into a ball.
Grab a 10″ skillet and line it with parchment paper, leaving plenty of overhang on the outside of the skillet. The parchment will be used as a sling to transfer the dough into the hot Dutch Oven. I like to lightly spray the parchment with a bit of cooking spray too.
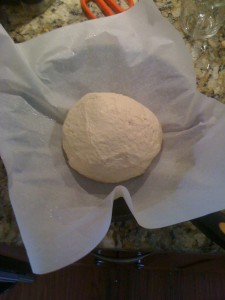
Non-shaggy ball. Snort.
Place the dough onto the parchment, cover with plastic wrap, and allow it to rise for 2 hours at room temp.
30 minutes before baking, turn your oven up to 500 degrees and preheat the Dutch Oven in there.
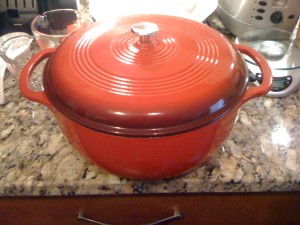
Dutch Oven. The good kind.
Also, please note the metal knob on this Dutch oven! Most Dutch ovens come with a plastic knob that is not heat resistant above 400 degrees. I went to Lowe’s and modified it by buying a metal cabinet knob for less than $2. Otherwise, the smell of fresh baked bread in the house will be replaced by stinky melted plastic. So either replace the knob with a metal one, or remove it altogether and stuff the hole with aluminum foil.
Alright, after the DO has been heated for 30 minutes, carefully remove it from the oven. Grab two corners of the parchment paper and transfer the dough into the Dutch oven, parchment and all. You’ll be cradling it like a sling.
Big hint – to prevent overbrowning on the bottom of the loaf, make a 6″ circle out of cardboard and put it on the bottom of the Dutch oven, under the parchment.
Now lower the temp of the oven to 425 degrees. Bake for 30 minutes covered. After 30 minutes, remove the lid and turn the Dutch oven around 180 degrees. Bake for an additional 20-35 minutes, or until the internal temp reaches 210 degrees. I use one of my trusty Acu-Rite probe-style meat thermometers for this. If you pull it too soon, the bread will be gummy in the center.
But if you accurately hit 210, you will be rewarded. Handsomely, even.
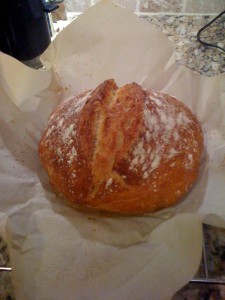
Fancy, right? And awesome.
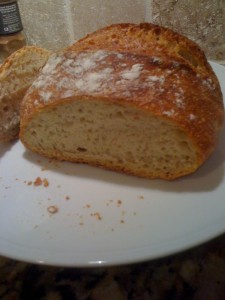
Look! Bubbles! Or air pockets! Which are essentially bubbles!
It’s so tempting to rip right into this warm bread, but again.. too soon will mean gummy bread. Wait until it cools to 100 degrees or lower before cutting in.
Make sure you have some GOOD butter on hand. Not Land O’ Lakes. Not Parkay. Go buy some Plugra, or Kerrygold, or Lurpak. The REAL stuff. And make sure it’s salted butter – although if it’s not, just add a bit of table salt to it and mix/mash it in.
As far as storage, a plain brown paper bag works best. Don’t put it in the fridge – it’ll get stale and gummy. Leave it on the counter in the bag with the top folded/rolled over. When you want some, you can eat it at room temp, or heat a slice up in the oven for 5 minutes. It’s even better this way.
And that is simple bread, done with a little bit of gadgetry. Hope you all enjoyed, if you’ve made it this far!
__________________
Thanks, Dan, for holding down the fort for me at home and on the blog! Love you, Me.

Rach (DonutsMama)
Thursday 4th of August 2011
That looks fantastic! Hubby bought me a Le Crueset for my birthday and anything I make in that is magical. I think this bread would be awesome to make in it!!
John
Thursday 4th of August 2011
I'm normally a "if I can't do it in a bread machine, it doesn't interest me" kind of guy, but I need to make this.
Paulette
Thursday 4th of August 2011
Ummm Yummmy! That looks delish and something I may try in winter. You know when it's not 100+ degrees out, I think it was 107 yesterday, I stopped checking though so I can't be sure. My niece did say it was 104 at midnight but she has twin toddlers (almost 2 yrs old) and a 5 yr old son, so who knows. And real butter?! Love It! Most everyone here eats that fakey crap. I make hubs buy real butter for me. It's gotta be better than that fake stuff. Great job filling in!
JP
Thursday 4th of August 2011
Whoah dude...intense technical post for some bread. Nice step by step breakdown. Dig it. I'm not allowed in the kitchen after 3 ft. flames shot out of our toaster oven. Sounds epic though!
Dan
Thursday 4th of August 2011
You saw my fiberglass tutorial, JP - I don't halfass when it comes to a how-to!
story
Thursday 4th of August 2011
Oh my, I do love bread. And beer bread is extra good.